Proper gutters installation is essential for protecting your home from water damage, foundation issues, and erosion. While often overlooked, a well-installed system efficiently channels rainwater away, safeguarding your property and landscaping. Homeowners in Saginaw, TX should understand the installation process to ensure long-term durability and performance.
A high-quality system does more than manage water—it prevents costly repairs, preserves landscaping, and enhances the overall value of your property. Whether you are investing in residential gutter installation or a larger commercial gutter solution, following a step-by-step approach ensures efficiency and reliability.
Why Proper Installation Matters
Even minor installation errors can lead to major problems down the road. Improperly aligned channels can cause water to overflow, pooling near foundations, walls, or landscaping. This can result in erosion, basement flooding, or structural damage.
A professionally installed system by experts like All-Star Seamless Gutters guarantees accurate measurements, proper slope alignment, and durable materials that stand up to Texas weather. In Weatherford, TX, professional installation also reduces the risk of sagging, leaks, and maintenance headaches, giving homeowners peace of mind.
Step 1: Assess Your Property Needs
Before starting, carefully evaluate your property:
- Roof Size and Pitch – The size and slope of your roof determine how much water the system must handle. Steeper or larger roofs need larger channels and downspouts.
- Material Preferences – Options include aluminum, steel, and vinyl. Aluminum is lightweight and rust-resistant, steel offers unmatched strength, and vinyl is low-cost and easy to install.
- Residential vs. Commercial Requirements – Residential systems handle typical rainfall, while commercial systems often require more capacity and stronger supports.
Proper assessment prevents undersized channels, misaligned slopes, and future overflow problems.
Step 2: Choose the Right Materials
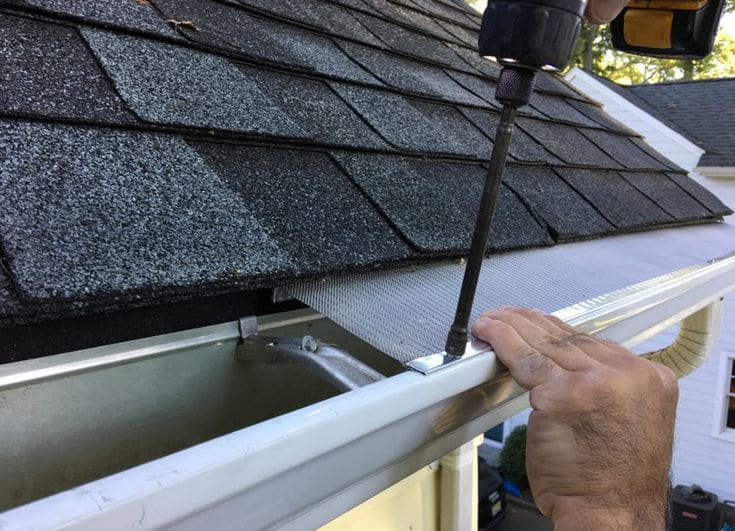
Investing in durable, rust-resistant options ensures longevity and resilience against storms and extreme weather. Consider adding gutter covers to reduce debris buildup, minimize cleaning frequency, and extend the system’s lifespan.
Material Comparison:
- Aluminum: Rust-resistant, lightweight, affordable, easy to install.
- Steel: Very strong, can handle heavy rainfall, but may rust if not coated.
- Vinyl: Low-cost, simple installation, but less durable under extreme heat or heavy snow.
- Copper: Premium option, long-lasting and stylish, but expensive.
Choosing the right material ensures a reliable gutter system suited to your home and climate.
Step 3: Measure and Mark
Accurate measurements are critical. Proper slope is essential for effective drainage—typically, channels should slope about 1/4 inch for every 10 feet toward downspouts.
Mark placement points along the roofline to maintain consistent alignment. Take note of corners, junctions, and areas where water tends to pool. Proper planning reduces installation errors and ensures smooth water flow.
Step 4: Install the Channels
Attach channels along the roof edges, maintaining the correct slope. Use brackets or hangers as recommended for your material type. Make sure each section is securely fastened to prevent sagging or separation during heavy rain.
Corners and joints require special attention. For seamless systems, professional technicians ensure minimal seams and precise alignment, which reduces leaks and long-term maintenance needs.
Step 5: Install Downspouts
Downspouts must be strategically placed to divert water at least five feet away from the foundation. Proper placement protects landscaping and prevents water from seeping into basements or crawl spaces.
For large homes or properties with heavy rainfall, consider multiple downspouts to distribute water efficiently. Extensions can further direct runoff away from high-risk areas.
Step 6: Test the System
After installation, run water through the system to check for leaks, misalignment, or clogs. Even small errors in slope or attachment can result in overflow, pooling, or damage over time. Address any issues immediately to ensure maximum efficiency.
Step 7: Maintenance Tips
Routine maintenance is crucial for long-term performance:
- Clean channels twice a year, especially in fall and spring.
- Inspect for sagging, rust, or leaks.
- Ensure downspouts remain clear and properly aligned.
- Check gutter covers for debris buildup and replace if damaged.
- Schedule professional gutter repair near me as needed for complex fixes.
Regular upkeep prevents major repairs, keeps the system flowing efficiently, and extends its life.
Common Problems and Solutions
- Overflowing Water: Caused by improper slope or clogs; fix by adjusting angle or cleaning debris.
- Sagging Channels: Occurs when brackets are spaced too far apart; install additional supports.
- Leaks at Joints: Use sealant or consider seamless channels for long-term protection.
- Downspout Blockages: Clean regularly and add extensions to divert water away from the foundation.
Final Thoughts
A step-by-step approach to gutters installation ensures your home remains protected from water damage, erosion, and structural issues. From selecting durable materials to proper slope alignment and ongoing maintenance, each stage is critical.
Investing in professional installation in Saginaw, TX safeguards your property, reduces maintenance costs, and ensures long-term performance. Whether residential or commercial, a well-installed system provides peace of mind and lasting protection.
FAQs
1. Do gutters prevent water damage?
Yes, they redirect rainwater away, protecting walls, foundation, and landscaping.
2. What is the average cost of gutter protection?
Typically $800–$2,500 depending on material, size, and installation.
3. What do roofers say about gutter guards?
Roofers recommend guards to minimize clogs, reduce maintenance, and extend system lifespan.
4. How often should I clean my system?
At least twice a year, especially during fall and spring.
